
Tip: You can lock Discussion Board threads so that students cannot edit their posts or add to the thread.
Here’s how to do it:
Navigate to the Discussion Board area in your course. Click on the discussion forum in which you would like to lock threads. Place a checkmark in the boxes to the left of the threads you would like to lock. If you want to lock all threads, click the Go button next to the Select All drop-down menu at the bottom of the page.
After selecting the threads, click the Lock button at the top of the page. Notice that the status of the locked threads will change from Published to Locked. A locked thread is still readable by users but can no longer be added to or modified.
Unlocking Discussion Board threads:
To unlock a Discussion Board thread, place a checkmark in the box next to the thread and click the Unlock button.
Want more information?
Step-by-step tutorials are available at: http://www.twu.edu/blackboard/Bb72Tutorials.asp
Visit our website: http://www.twu.edu/blackboard,
or call: (940) 898-3706
Thursday, April 17, 2008


Thursday, April 10, 2008
Tip #13: Early Warning System Rules
Tip: You can assess students’ progress in your course by creating Early Warning System rules.
Here’s how to do it:
Navigate to your course Control Panel and click the Early Warning System. You can add a Grade Rule, a Due Date Rule, or a Last Access Rule.
Here’s how to do it:
Navigate to your course Control Panel and click the Early Warning System. You can add a Grade Rule, a Due Date Rule, or a Last Access Rule.
- A Grade rule identifies when student performance is equal to, below, or above a defined level.
- A Due Date rule identifies students who do not complete work by the due date.
- A Last Access rule identifies the last time a student accessed the course.
Example: Adding a Grade rule
In this example, an instructor chooses to receive Early Warning System notification for every student who scores lower than a 70 on the Midterm exam. Click the + Grade Rule button and type a name for the rule. Select a Gradebook item for which you would like to be notified; in this example the instructor selects the Midterm exam. Define the criteria (e.g., less than or equal to) and the score (e.g. 70). Click Submit to save the rule.
Place a checkmark next to the new rule and click the Refresh button. Exit the Early Warning System and return to that area to view the updated page. To view a list of the students who meet the criteria, click the name of the rule. NOTE: The rules do not automatically update; you must Refresh the rules to see if any new students meet the criteria.
Want more information?
Step-by-step tutorials are available at: http://www.twu.edu/blackboard/Bb72Tutorials.asp
Visit our website: http://www.twu.edu/blackboard,
or call: (940) 898-3706
Thursday, April 3, 2008
Tip #12: Adding Gradebook comments
Tip: You can add comments to any Gradebook item.
Here’s how to do it:
Navigate to your course Gradebook and click the name of Gradebook item. Click Item Grade List and enter students’ scores (if scores have not already been submitted for the item). Click Submit to save the scores. NOTE: A grade must be submitted for a Gradebook item before you can add comments to the item.
Click the name of the Gradebook item again and click Item Grade List. Click the Modify Comments button next to a student’s grade. Type or paste in your comment in the Comment box. If you want the student to be able to see the comment, make sure the Is Public box is checked. Unchecking the Is Public box will hide the comment from the student. Click Submit to save the comment. Click Submit on the Item Grade List page to save your changes.
Want more information?
Step-by-step tutorials are available at: http://www.twu.edu/blackboard/Bb72Tutorials.asp
Visit our website: http://www.twu.edu/blackboard,
or call: (940) 898-3706
Here’s how to do it:
Navigate to your course Gradebook and click the name of Gradebook item. Click Item Grade List and enter students’ scores (if scores have not already been submitted for the item). Click Submit to save the scores. NOTE: A grade must be submitted for a Gradebook item before you can add comments to the item.
Click the name of the Gradebook item again and click Item Grade List. Click the Modify Comments button next to a student’s grade. Type or paste in your comment in the Comment box. If you want the student to be able to see the comment, make sure the Is Public box is checked. Unchecking the Is Public box will hide the comment from the student. Click Submit to save the comment. Click Submit on the Item Grade List page to save your changes.
Want more information?
Step-by-step tutorials are available at: http://www.twu.edu/blackboard/Bb72Tutorials.asp
Visit our website: http://www.twu.edu/blackboard,
or call: (940) 898-3706
Wednesday, April 2, 2008
Tip #11: Turning on/off course tools
Tip: You can turn on or turn off course tools in your Blackboard shell.
Here’s how to do it:
Navigate to the Control Panel of your course. Click Manage Tools. Click Tool Availability to choose the availability of course tools such as Email, Groups, Messages, and Roster. Click Building Block Tool Availability to choose the availability of Advanced Group Management and Add Users by Role tools. Click Content Type Availability to choose the availability of content types that can be added to content areas.
Communication tools:
You can make communication tools available or unavailable by navigating to the Control Panel and clicking Manage Course Menu. Click the Modify button next to the Communication menu item. Select the availability of the listed tools and click Submit.
Turning off tools:
You may want to turn off some of the tools that you will not be using so that students do not use those tools. For example, if you are using Email instead of Messaging, you may consider turning off Messaging so that students do not try to use that tool to communicate with you.
Want more information?
A step-by-step tutorial is available at: http://www.twu.edu/blackboard/Bb72Tutorials.asp
Visit our website: http://www.twu.edu/blackboard,
or call: (940) 898-3706
Here’s how to do it:
Navigate to the Control Panel of your course. Click Manage Tools. Click Tool Availability to choose the availability of course tools such as Email, Groups, Messages, and Roster. Click Building Block Tool Availability to choose the availability of Advanced Group Management and Add Users by Role tools. Click Content Type Availability to choose the availability of content types that can be added to content areas.
Communication tools:
You can make communication tools available or unavailable by navigating to the Control Panel and clicking Manage Course Menu. Click the Modify button next to the Communication menu item. Select the availability of the listed tools and click Submit.
Turning off tools:
You may want to turn off some of the tools that you will not be using so that students do not use those tools. For example, if you are using Email instead of Messaging, you may consider turning off Messaging so that students do not try to use that tool to communicate with you.
Want more information?
A step-by-step tutorial is available at: http://www.twu.edu/blackboard/Bb72Tutorials.asp
Visit our website: http://www.twu.edu/blackboard,
or call: (940) 898-3706
Wednesday, March 26, 2008
Tip #10: Enabling Review Status
Tip: You can enable Review Status for course items.
Here’s how to do it:
Enter your course and navigate to the item to which you want to add Review Status. Click the Edit View link on the top right corner of the page to bring up options for that item. Click the Manage button for that item.
Click Review Status and select the Enable option. Click Submit. Click OK to return to the main content area page. Click the Display View link on the top right corner of the page to view what the students will see.
Using Review Status:
Review Status may be helpful if you have a document or course item that you want to verify whether or not students have viewed it. For example, you might add Review Status to a document containing course policies so that students can acknowledge that they read the document.
Review Status tracking is available through the Performance Dashboard. Navigate to the Control Panel and then click Performance Dashboard. In the Review Status column, you will see the number of course items each student has marked as review. Click on a number in that column to view specific information about what a student has and has not marked as reviewed.
Want more information?
Step-by-step tutorials are available at: http://www.twu.edu/blackboard/Bb72Tutorials.asp
Visit our website: http://www.twu.edu/blackboard,
or call: (940) 898-3706
Here’s how to do it:
Enter your course and navigate to the item to which you want to add Review Status. Click the Edit View link on the top right corner of the page to bring up options for that item. Click the Manage button for that item.
Click Review Status and select the Enable option. Click Submit. Click OK to return to the main content area page. Click the Display View link on the top right corner of the page to view what the students will see.
Using Review Status:
Review Status may be helpful if you have a document or course item that you want to verify whether or not students have viewed it. For example, you might add Review Status to a document containing course policies so that students can acknowledge that they read the document.
Review Status tracking is available through the Performance Dashboard. Navigate to the Control Panel and then click Performance Dashboard. In the Review Status column, you will see the number of course items each student has marked as review. Click on a number in that column to view specific information about what a student has and has not marked as reviewed.
Want more information?
Step-by-step tutorials are available at: http://www.twu.edu/blackboard/Bb72Tutorials.asp
Visit our website: http://www.twu.edu/blackboard,
or call: (940) 898-3706
Tuesday, March 18, 2008
Tip #9: Copying Discussion Board forums
Tip: You can copy a Discussion Board forum within a course or to a group in a course.
Here’s how to do it:
Enter the course in which you would like to copy a forum. Click the Discussion Board course menu link. Click the Copy button next to the forum that you would like to copy.
On the next screen, type a Name for the copied Discussion Board forum. Select whether you would like to copy the Entire forum or just the Forum Settings. NOTE: If you copy the Entire forum, all posts will be copied with the forum. If you copy only the Forum settings, no posts will be copied.
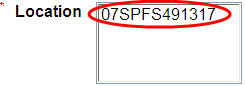
Select the location to which you would like to copy the Discussion Board forum. You can select to copy the forum into the course Discussion Board area* or to one of the course groups, if you enabled groups in your course. Click Submit to submit your copy request. You will receive confirmation via email that the forum copy was successfully completed.
*NOTE: The course Discussion Board area is designated by your course ID. If you do not have any groups in your course, only the Discussion Board area will be listed in your Location box.
Want more information?
Step-by-step tutorials are available at: http://www.twu.edu/blackboard/Bb72Tutorials.asp
Visit our website: http://www.twu.edu/blackboard,
or call: (940) 898-3706
Here’s how to do it:
Enter the course in which you would like to copy a forum. Click the Discussion Board course menu link. Click the Copy button next to the forum that you would like to copy.
On the next screen, type a Name for the copied Discussion Board forum. Select whether you would like to copy the Entire forum or just the Forum Settings. NOTE: If you copy the Entire forum, all posts will be copied with the forum. If you copy only the Forum settings, no posts will be copied.
Select the location to which you would like to copy the Discussion Board forum. You can select to copy the forum into the course Discussion Board area* or to one of the course groups, if you enabled groups in your course. Click Submit to submit your copy request. You will receive confirmation via email that the forum copy was successfully completed.
*NOTE: The course Discussion Board area is designated by your course ID. If you do not have any groups in your course, only the Discussion Board area will be listed in your Location box.

Want more information?
Step-by-step tutorials are available at: http://www.twu.edu/blackboard/Bb72Tutorials.asp
Visit our website: http://www.twu.edu/blackboard,
or call: (940) 898-3706
Monday, March 10, 2008
Tip #8: Create and manage groups with Advanced Group Management
Tip: Create and manage groups using the Advanced Group Management tool.
Here’s how to do it:
Navigate to the Control Panel of your course and click Advanced Group Management. Click Add Group to add a new group. Name the group and select the communication tools for that group. Click Submit.
Add users to your group by placing a checkmark next to the group name and clicking View/Assign Users. Click Modify and place a checkmark next to the users you want to add to the group. Click Submit.
Discussion Forums in groups: When you enable the discussion board tool in a group, a forum for that group is automatically created. You can create additional forums in a group and copy those forums to other groups using the Copy button for each forum. NOTE: Every graded discussion forum in a group will automatically generate a Gradebook item.
Want more information?
Step-by-step tutorials are available at: http://www.twu.edu/blackboard/Bb72Tutorials.asp
Visit our website: http://www.twu.edu/blackboard,
or call: (940) 898-3706
Here’s how to do it:
Navigate to the Control Panel of your course and click Advanced Group Management. Click Add Group to add a new group. Name the group and select the communication tools for that group. Click Submit.
Add users to your group by placing a checkmark next to the group name and clicking View/Assign Users. Click Modify and place a checkmark next to the users you want to add to the group. Click Submit.
Discussion Forums in groups: When you enable the discussion board tool in a group, a forum for that group is automatically created. You can create additional forums in a group and copy those forums to other groups using the Copy button for each forum. NOTE: Every graded discussion forum in a group will automatically generate a Gradebook item.
Want more information?
Step-by-step tutorials are available at: http://www.twu.edu/blackboard/Bb72Tutorials.asp
Visit our website: http://www.twu.edu/blackboard,
or call: (940) 898-3706
Subscribe to:
Posts (Atom)
