Tip: Use tables in the Visual Text Box Editor (VTBE) to organize your content and images.
Here’s how to do it:
Navigate to a content area in your course (e.g. Course Documents) and click the Edit View link in the upper right-hand corner of the page. Click the + Item button to add a new item. Name the item and then click in the text box below. This is where you will add your table.
On the Visual Text Box Editor (VTBE), click the Create Table button.
Select the number of columns and rows for the table. Click Submit to add the table to the text box.
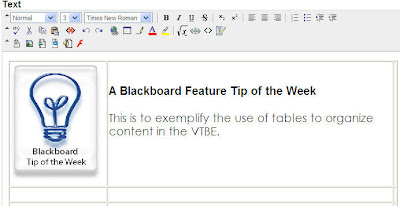
Add text or images to your table. After you have added your content, click the Submit button to save your content. Below is an example of how you might use tables to organize your content:

How to remove the table outlines:
To remove the table outlines, you will need to modify the HTML code for the table. Click the < > button on the VTBE to open the HTML view. You will see the following format code for the table:
Here’s how to do it:
Navigate to a content area in your course (e.g. Course Documents) and click the Edit View link in the upper right-hand corner of the page. Click the + Item button to add a new item. Name the item and then click in the text box below. This is where you will add your table.
On the Visual Text Box Editor (VTBE), click the Create Table button.
Select the number of columns and rows for the table. Click Submit to add the table to the text box.
Add text or images to your table. After you have added your content, click the Submit button to save your content. Below is an example of how you might use tables to organize your content:

How to remove the table outlines:
To remove the table outlines, you will need to modify the HTML code for the table. Click the < > button on the VTBE to open the HTML view. You will see the following format code for the table:
To remove the table outlines, you will need to modify the HTML code for the table. Click the < > button on the VTBE to open the HTML view. You will see the following format code for the table:
In the part of the code that says “border=1”, change the 1 to a 0. Click the < > button again to switch back to your standard view. You will see that the table borders have disappeared. Click Submit to save your changes.
Want more information?
Step-by-step tutorials are available at: http://www.twu.edu/blackboard/Bb72Tutorials.asp
Visit our website: http://www.twu.edu/blackboard,or call: (940) 898-3706
Step-by-step tutorials are available at: http://www.twu.edu/blackboard/Bb72Tutorials.asp
Visit our website: http://www.twu.edu/blackboard,or call: (940) 898-3706


No comments:
Post a Comment