
Tip: End of Semester Checklist
End-of-semester checklist:
1. Export the final course gradebook.
2. Archive your Blackboard course.
3. Make the course unavailable.
Exporting the Blackboard Gradebook
1) Access the course that contains the Gradebook you want to export
2) Click the Control Panel link
3) Click Gradebook
4) Click the Download Grades button
5) Select Comma or Tab as the Delimiter Type (both file types can be opened in MS Excel)
6) Click the Submit button and then click the Download button
7) Save the file to your Desktop (or anywhere on your computer that is appropriate)
8) Click OK
Archiving a Blackboard Course
1) Access the course you want to archive
2) Click the Control Panel link
3) Under the Course Options category, click Archive Course
4) Click the Archive button
5) Click Submit
6) After you receive the archive completion email, navigate to the Archive Course page again. Right-click the zipped course file and click Save Target As… to save the file to your computer
7) Click OK
Making a Course Unavailable
1) Access the course you want to make unavailable
2) Click the Control Panel link
3) Under the Course Options category, click Settings
4) Click Course Availability
5) Select No
6) Click Submit
Thursday, December 11, 2008
Wednesday, December 3, 2008
Tip #44: Weight Gradebook items by category or by item
Tip: You can weight Gradebook items by category or by item.
Here’s how to do it:
Navigate to your course Control Panel and click Gradebook. Click the Weight Grades button. Select the option to Weight by Category or to Weight by Item. Assign weight percentages to the desired categories or items. The percentages must add up to 100%. Click Submit to save the weights.
NOTE: After you assign weight to Gradebook items or categories, you cannot remove the weighting option from the Gradebook. Add weighting to the Gradebook only if you are certain that you will continue to use weighting the entire semester.
Weighting by Category:
Weighting by category allows you to assign a weight percentage to a particular type of Gradebook item, rather than to each Gradebook item. For example, you can weight all course quizzes at 30% of the students’ total grades. Each time you add a quiz, the weight percentage for each quiz will adjust accordingly.
To use this feature correctly, it is important that you assign Gradebook items to appropriate categories. You can change a Gradebook item’s category by clicking the Manage Items button in the Gradebook and clicking the Modify button next to the Gradebook item you want to change. Select a new category for the item and click Submit.
Monday, November 24, 2008
Tip #43: 2009 Blackboard Exemplary Course Program
Tip: Announcing the 2009 Blackboard Exemplary Course Program
The Blackboard Exemplary Course Program aims to help faculty use e-Learning technology more effectively by identifying and disseminating best practices for designing engaging online courses.
Using a rubric, instructors and course designers are able to evaluate how well their own course conforms to best practices for Course Design, Interaction & Collaboration, Assessment and Learner Support.
Consider participating in the 2009 Exemplary Course Program by submitting a course of your own or volunteering to be a reviewer or both!
There are many benefits to participating in the Exemplary Course Program:
- Learn course design best practices to improve the engagement, collaboration, assessment and learner support within your own courses
- Develop a fresh perspective by seeing how other instructors and designers from your discipline or area of interest are developing their courses
- Apply lessons learned from the Exemplary Course Rubric to your own courses or those you are helping to develop
- Receive detailed feedback on your own course development on the best practices you are employing or areas in which it can be improved
- Gain professional development experience and recognition for your accomplishments and participation in the program
This is a valuable learning experience for even the most seasoned instructor or designer.
To learn more about the 2009 Exemplary Course Program visit http://www.blackboard.com/ecp where you will find information on how to: - Volunteer to be a reviewer
- Download the Exemplary Course Rubric and explore best practices
- Learn about how to participate in the 2009 Exemplary Course Program
We encourage you to consider participating in the Exemplary Course Program. If you have questions please send an email to: ecp@blackboard.com
Wednesday, November 19, 2008
Tip #42: Test Generator
Tip: You can upload tests from Word to Blackboard using a test generator.
A test generator created by BYU-Idaho allows instructors to type their test in Word and then upload into Blackboard. Tests must be formatted for the generator to work correctly. This program is designed for simple test designs including essay, multiple answer, multiple choice and true/false questions. Question options can be modified once the test is imported into Blackboard.
Here’s how to do it:
1. Type in your test and format it in Word:
Number your test questions. Do not put number/letters next to the responses.
Skip one line between test questions.
Place an asterisk (*) in front of the correct answer.
Multiple choice questions: Type your question, and on the very next line start your answers. Put an asterisk(*) directly in front of any correct answers.
Example:
1. Which one of these is not another name for sugar?
sucrose
*sodium
glucose
maple syrup
Multiple answer questions: Type in your question, press Enter, on the very next line enter your answers. Put an * directly in front of any correct answers.
Example:
1. Whole grains are an important part of a healthy diet. The three parts of a grain kernel are:
Exoskeleton
*Bran
*Germ
*endosperm
Essay questions: Type your question and give no answer. Move on to the next question number.
Example:
1. What should you consider when selecting food from the fruit group?
True/False questions: Type your question, and on the very next line type True. On the next line type False (T and F won’t work). Put an *asterisk directly in front of the correct answer.
Example:
1. The meat and beans food group includes only beef and lima beans
True
*False
2. Convert the test using the test generator:
Copy the test from the Word document. Open the test generator located at: http://www.byui.edu/insttech/bbtest.asp and paste (CTRL-V) your test into the text box. Click Save as text file. Note the location of the saved file.
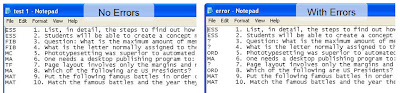
Open the saved file. This will open the file in Notepad and you can perform a quick check to see if there are any obvious errors. If there are no errors, it will look similar to the first example. If there are errors, it will have question marks in the left column as seen in the second example. Go back and check the formatting in Word. If the correct number of questions is not listed, check that Enter was pressed between each question in Word.
3. Upload questions into a test.
From the Control Panel, select Test Manager. Click the Add Test Button. Name your test. Description and Instructions are optional at this point (they can be changed later). Scroll to the bottom and click Submit. Click the drop down menu next to Add Question and select Upload Questions. Click GO. Click Browse to find the file you saved from the test generator. Click Open. Set the number of points possible per question. Click Submit. A Question Upload Complete screen should appear. Click OK to proceed.
The questions will appear in the test.
NOTE: If an Error message appears, the Word document was not formatted correctly. Make changes and copy past it again into the Test Generator. Repeat the steps again from Section 2.
NOTE: Questions can also be added to a test pool by selecting Pool Manager and following the same steps for uploading questions.
A test generator created by BYU-Idaho allows instructors to type their test in Word and then upload into Blackboard. Tests must be formatted for the generator to work correctly. This program is designed for simple test designs including essay, multiple answer, multiple choice and true/false questions. Question options can be modified once the test is imported into Blackboard.
Here’s how to do it:
1. Type in your test and format it in Word:
Number your test questions. Do not put number/letters next to the responses.
Skip one line between test questions.
Place an asterisk (*) in front of the correct answer.
Multiple choice questions: Type your question, and on the very next line start your answers. Put an asterisk(*) directly in front of any correct answers.
Example:
1. Which one of these is not another name for sugar?
sucrose
*sodium
glucose
maple syrup
Multiple answer questions: Type in your question, press Enter, on the very next line enter your answers. Put an * directly in front of any correct answers.
Example:
1. Whole grains are an important part of a healthy diet. The three parts of a grain kernel are:
Exoskeleton
*Bran
*Germ
*endosperm
Essay questions: Type your question and give no answer. Move on to the next question number.
Example:
1. What should you consider when selecting food from the fruit group?
True/False questions: Type your question, and on the very next line type True. On the next line type False (T and F won’t work). Put an *asterisk directly in front of the correct answer.
Example:
1. The meat and beans food group includes only beef and lima beans
True
*False
2. Convert the test using the test generator:
Copy the test from the Word document. Open the test generator located at: http://www.byui.edu/insttech/bbtest.asp and paste (CTRL-V) your test into the text box. Click Save as text file. Note the location of the saved file.
Open the saved file. This will open the file in Notepad and you can perform a quick check to see if there are any obvious errors. If there are no errors, it will look similar to the first example. If there are errors, it will have question marks in the left column as seen in the second example. Go back and check the formatting in Word. If the correct number of questions is not listed, check that Enter was pressed between each question in Word.

3. Upload questions into a test.
From the Control Panel, select Test Manager. Click the Add Test Button. Name your test. Description and Instructions are optional at this point (they can be changed later). Scroll to the bottom and click Submit. Click the drop down menu next to Add Question and select Upload Questions. Click GO. Click Browse to find the file you saved from the test generator. Click Open. Set the number of points possible per question. Click Submit. A Question Upload Complete screen should appear. Click OK to proceed.
The questions will appear in the test.
NOTE: If an Error message appears, the Word document was not formatted correctly. Make changes and copy past it again into the Test Generator. Repeat the steps again from Section 2.
NOTE: Questions can also be added to a test pool by selecting Pool Manager and following the same steps for uploading questions.
Wednesday, November 12, 2008
Tip #41: Adding and removing instructors in your course
Tip: You can add instructors to your course and remove instructors from your course.
Here’s how to do it:
Navigate to your Control Panel and click Enroll User. Search for the instructor’s username by typing the last name and clicking the Search button. Place a checkmark next to the desired user’s name and click Submit. Return to the Control Panel and click List/Modify Users. Click the Search button and click the Properties button next to the instructor’s name. Under Role and Availability, select the Instructor role and click Submit.
To remove an instructor from your course, navigate to the Control Panel and click List/Modify Users. Click the Search button and click the Properties button next to the instructor’s name. Under Role and Availability, select the Student role and click Submit. Return to the Control Panel and click Remove Users from Course. Click the Search button and place a checkmark next to the instructor’s username. Type Yes in the confirmation box and click Submit.
NOTE: You must type Yes, with a capital Y.
Using the Add Users by Role feature:
If you know the Blackboard username of the instructor you want to add, you can use the Add Users by Role feature. Navigate to your Control Panel and click Add Users by Role. Select the role for the user from the drop-down box. Type the Blackboard username(s) in the username box. NOTE: You can add multiple users at once by separating each username with a comma. Click Submit to add the user.
Wednesday, November 5, 2008
Tip #40: Grade Discussion Board forums or threads
Tip: You can grade Discussion Board forums or threads.
Here’s how to do it:
Navigate to your course Discussion Boards and click the Modify button for a discussion forum. Under Forum settings, select Grade forum or Grade threads. Grading a forum will allow you to assign grades for students’ posts to that forum. Grading a thread will allow you to assign grades for students’ replies to each thread in a forum.
After you have enabled grading, click the Grade icon next to the forum or thread you want to grade. Click the Grade button next to a student’s name. The student’s posts to the forum or thread will display. You can filter, sort, and print the student’s posts. To submit a grade for the posts, type a grade in the Grade box and click the Submit button.
Discussion grading and the gradebook:
It is important to note that when you enable grading for a forum or thread, columns for those forums or threads are automatically generated in the gradebook. When you enable grading by forum, a column for that forum is created in the gradebook. When you enable grading by thread, a column for EACH thread in a forum is created in the gradebook. Keep this in mind when choosing whether to grade by forum or thread. Gradebook management can become cumbersome if you choose to grade a large number of threads.
Wednesday, October 29, 2008
Tip #39: Compress PowerPoint slideshows for better uploading to Blackboard
Tip: You can compress PowerPoint slideshows for better uploading to Blackboard.
PowerPoint files that contain images and photos can quickly become very large files. This can cause them to take a very long time to attach and download in Blackboard. Office allows you the option to compress images allowing you to have a smaller file size for PowerPoints that will be displayed only on the screen.
PowerPoint files that contain images and photos can quickly become very large files. This can cause them to take a very long time to attach and download in Blackboard. Office allows you the option to compress images allowing you to have a smaller file size for PowerPoints that will be displayed only on the screen.
Here’s how to do it:
Compressing Images in PowerPoint 2007
- Open the PowerPoint file.
- Navigate to the Office Button in the upper left hand corner.
- Click Save As- PowerPoint Presentation.
- Click the Tools drop down menu on the lower left hand side of Save As menu
- Select Compress Pictures
- Click Options
- Under Options check:
a. Check automatically perform basic compression on save
b. Check Delete cropped areas of pictures
c. Check e-mail for the target output - Click OK
- Click OK to the Apply compression settings now dialog.
- Change the filename (ex: unit1_compressed.ppt)
- Click Save
Compressing Images in PowerPoint 2003 and earlier
- Open your PowerPoint presentation
- Click File Menu and then Save as
- In the save dialog box, click the Tools drop down menu
- Select Compress Pictures
- Select All Pictures in document
- Select Web/Screen.
- Select Compress pictures and Delete cropped areas of pictures
- Click OK
- Confirm that you want to Compress Pictures (if the dialog appears)
- Change the filename (example: unit2_compressed.ppt)
- Click Save
Note: It’s best to keep a copy of the original PowerPoint if you intend to print high quality handouts. PowerPoints compressed for web/screen use may appear grainy when printed.
Wednesday, October 22, 2008
Tip #38: Subscribe to Discussion Board forums and threads
Tip: You and your students can subscribe to Discussion Board forums and threads.
Here’s how to do it:
Navigate to your course Discussion Boards and click the Modify button for a discussion forum. Under Forum settings, select Allow members to subscribe to: Forum and Threads. Click Submit. Users who subscribe to forums or threads will receive an email when forums or threads are updated.
NOTE: Enabling subscribing to forums and threads gives users the option to subscribe. Each user, including the instructor, can choose whether or not he/she wants to subscribe to a forum or thread. Once subscriptions are enabled users will see a Subscribe button on either the Forum or the Thread.
Tips for using subscriptions:
- Encourage all users who subscribe to forums or threads to check the SPAM filter settings on their email accounts. Some email programs may filter Blackboard emails as junk mail.
- Help users understand the difference between subscribing to a forum and subscribing to a thread. When users subscribe to a forum, they receive emails each time any thread in the forum is updated. When users subscribe to a thread, they receive emails each time that particular thread is updated.
Wednesday, October 15, 2008
Tip #37: Modify the content and layout of your Blackboard Welcome page.
Tip: You can modify the content and layout of your Blackboard Welcome page.
Here’s how to do it:
Log in to Blackboard. On your Blackboard Welcome page, click the Modify Content button located in the upper right hand corner.
Place a checkmark next to the content modules you want to add to your Welcome page. Un-check any modules you want to remove from your Welcome page. Click Submit to save your changes.
NOTE: Some modules cannot be removed from the Welcome page. These items are marked by a red checkmark.
Modifying the layout of your Welcome page:
To modify the layout of your Blackboard Welcome page, click the Modify Layout button located in the upper right hand corner.
Under Customize Page Layout, select a module and click the arrow buttons to move the module up, down, or to another column. You may also change the color scheme of your modules. Click Submit to save your changes.

Wednesday, October 8, 2008
Tip #36: Discussion Post Ratings
Tip: You can enable discussion post rating on your course Discussion Boards.
What is discussion post rating?
Discussion ratings allow students and instructors to rate discussion posts on a scale of 1 to 5. Ratings appear as stars in the upper right hand corner of each discussion post.
NOTE: Users are able to see only the overall rating for a discussion post. This means that students and instructors cannot see who rated which posts or how many users rated the posts.
Here’s how to do it:
Navigate to your course Discussion Boards and click the Modify button for a discussion forum. Under Forum settings, select Allow members to rate posts. Click Submit. Users will have a drop down menu in the upper right hand corner of the post enabling them to rate discussion posts on a 5-star scale.
Tips for discussion post rating:
The post rating tool is not a grading tool. The rating tool can be used to motivate students to read each other’s posts and to improve the quality of their own discussion posts. It is recommended that you provide a rating rubric for students. This will help students to apply appropriate lenses when reading other student’s posts and it will help students to know the standards by which their posts will be graded.
Wednesday, October 1, 2008
Tip #35: Web Browsers & Java affect your Blackboard experience
Tip: Web browsers and Java affect your Blackboard experience
Here’s how to do it:
As with all programs, web browsers differ in how they work with Blackboard. Often issues that arise for users can be overcome by trying a different web browser.
The three major web browsers used are Internet Explorer (primarily on PC’s), Safari (primarily on Macs) and Mozilla Firefox.
When browsers provide newer versions, it’s considered good practice to wait until it has been released for a while before updating. This wait ensures that programs working inside the browser (like Blackboard!) will have found any potential incompatibilities and update as well.
If you’re experiencing difficulties, try downloading an alternate browser and see if the issue continues. Firefox 2.0, the most compatible version of Firefox with Blackboard, can be downloaded at http://www.mozilla.com/en-US/firefox/all-older.html
It might not be just your web browser
Blackboard depends on the use of an internet plug-in, Java. Having an up-to-date version of Java will enhance your Blackboard experience. The most current version of Java is Version 6 update 7. There are several methods of checking your java version but the Java website will do a quick check for you and display the version. You can test if Java is working and check your version of Java by going to: http://www.java.com/en/download/help/testvm.xml?ff3
If you notice Blackboard issues and you’re running an older version of Java, you might consider updating your Java version. The Java website provides free downloads of its latest version at: http://www.java.com/en/download/
When this still doesn’t help
Call the helpdesk for assistance! Be prepared to tell them what browsers you’ve tried things in and which version of Java you’re running. This will help those troubleshooting quickly identify any problem areas or trends in issues being reported.
Thursday, September 25, 2008
Tip #34: Adding a Course Banner
Tip: You can add a banner to your course.
Here’s how to do it:
A course banner is an image that appears at the top of the Announcements page of your course. To add a banner to your course, navigate to the Control Panel. Click Course Design and then click Course Banner.
Click the Browse button to locate the desired image on your computer. Select the desired image file and click Open. Click Submit to upload the image as your course banner. NOTE: You must upload image files in .jpeg or .gif formats. Blackboard does not recognize other image formats.
Cautions when adding course banners:
Some course banners may create accessibility issues for course users. To avoid these issues, we recommend the following guidelines for course banners:
- Avoid uploading banners that contain moving images. Moving images may increase students’ page loading time and may interfere with students’ browsers.
- Avoid using large images. Keep images within 500 x 500 megapixels.
- Avoid uploading image files that are too large. The file size for any image uploaded to Blackboard should be no larger than 5 MB.
Wednesday, September 17, 2008
Tip #33: Helping students troubleshoot
Tip: You can help students to troubleshoot their Blackboard issues.
Here’s how to do it:
Consider posting a series of technical tips in Blackboard for your students. You might consider adding these tips to a Technical Support discussion board, allowing students and teaching assistants the chance to share concerns and solutions.
Students can follow a series of steps or procedures to troubleshoot their Blackboard issues. We recommend the following troubleshooting steps:
If the students’ issues persist after they have tried the troubleshooting steps, ask them to contact the TWU Help Desk. The Help Desk is available via phone, 940-898-9371 or via email, helpdesk@twu.edu. They also have a chat room in which students and faculty can discuss their Blackboard issues with Help Desk personnel. Students should be able to tell Help Desk their course information, instructor information, any troubleshooting steps they have tried, and as much detail as possible about what they do when the problem occurs, including any error message numbers.
Here’s how to do it:
Consider posting a series of technical tips in Blackboard for your students. You might consider adding these tips to a Technical Support discussion board, allowing students and teaching assistants the chance to share concerns and solutions.
Students can follow a series of steps or procedures to troubleshoot their Blackboard issues. We recommend the following troubleshooting steps:
- Log out of Blackboard and shutdown the computer. Restart the computer and re-log into Blackboard. Some issues may only require logging out and logging back in to Blackboard.
- Clear out your browser cache. If you use Internet Explorer as your browser, click the Tools menu option on your browser. Click Internet Options and select the option to delete your browsing history, temporary files, and cookies. Click OK. Close the browser entirely and re-start the browser. Log in to Blackboard.
- Try using another browser. Some issues may be caused by browser errors or incompatibility. Consider using another browser, such as Firefox or Safari (Mac users), to see if the issue persists in multiple browsers.
- Try using another computer at a different location. Some problems that you experience may actually be related to your personal computer or to your Internet Service Provider (ISP). Make sure that the problem is occurring in more than one location and on one computer.
- Turn off pop-up blockers while using Blackboard. Remember to enable them again once you’re done with Blackboard.
- Check the Known Issues website to see if the issue you are having is a known issue. This webpage describes fixes or work-around for several known issues in Blackboard. http://www.twu.edu/blackboard/known_issues.asp
If the students’ issues persist after they have tried the troubleshooting steps, ask them to contact the TWU Help Desk. The Help Desk is available via phone, 940-898-9371 or via email, helpdesk@twu.edu. They also have a chat room in which students and faculty can discuss their Blackboard issues with Help Desk personnel. Students should be able to tell Help Desk their course information, instructor information, any troubleshooting steps they have tried, and as much detail as possible about what they do when the problem occurs, including any error message numbers.
Thursday, September 11, 2008
Tip #32: Contingency Planning
Tip: You can create a contingency plan and develop back-up procedures for your Blackboard course.
Here’s how to do it:
Because of the volatile nature of technology, it is advisable that instructors who use Blackboard develop contingency plans and back-up procedures. Blackboard has several features that can assist instructors with this. We recommend that faculty consider the following procedures:
When creating your contingency plan, consider the following questions:
Here’s how to do it:
Because of the volatile nature of technology, it is advisable that instructors who use Blackboard develop contingency plans and back-up procedures. Blackboard has several features that can assist instructors with this. We recommend that faculty consider the following procedures:
- Archive your course periodically. Archiving a course allows you to save course content and user data to your computer or an external drive.
- Use the Gradebook Export feature to save a copy of your Gradebook to your computer. We recommend that instructors export their Gradebooks at least once a week. For instructions on exporting your Gradebook, view the Blackboard Tip #18.
- Develop and communicate to students a back-up plan in case Blackboard is not accessible.
When creating your contingency plan, consider the following questions:
- What are TWU’s policies regarding contingency plans?
- Does your department recommend or require any specific contingency procedures?
- Do you have multiple methods by which you can communicate with students in case of an emergency (e.g., email + phone + emergency website)?
- Will you be flexible with the course calendar and due dates if necessary?
- What contingency recommendations will you make to students (e.g., print your course syllabus, keep back-ups of all files submitted to Blackboard)?
- What back-up spaces could you use to continue your course if access to Blackboard or to the TWU campus was not possible?
Wednesday, September 3, 2008
Tip #31: Managing Student Access to Blackboard Courses
Tip: When students drop a class and are not automatically removed from Blackboard, you can limit their access to the course.
Limiting access to students who drop the course mid-semester
Students who have dropped a course mid-semester will not be removed from your Blackboard course roster. This is designed to allow instructors to keep records of all students in the course. Removing a student from the Blackboard course will delete all information, including grades for that student.
Here’s how to limit access and retain student information:
Navigate to your Control Panel and click the List/Modify Users link. Type the student’s last name, or click search to list the whole class roster. Select properties next to a student’s name. Scroll down to Section 4: Role and Availability. Under Available (this course only) select No. Click Submit.
NOTE: Limiting access to students will not remove them from your grade book. However, the student will no longer be able to log into the course.
Removing Students from a Course
If a student was never enrolled in the course per your WebAdvisor roster, removal of the student may be appropriate. Keep in mind that all student data will be removed including grades, assignment submissions and course statistics.
NOTE: Blackboard roster updates occur several times a day through the twelfth class day. It is possible that during these first days of the semester, students removed from a course will be added back into the course when the roster updates occur. Removing students after the twelfth class day will be permanent.
How to permanently remove a student from the course
Navigate to your Control Panel and click the Remove Users from Course link. Type the student’s last name, or click search to list the whole class roster. Place a checkmark next to the student’s name. Type the word Yes in the box and click Submit.
NOTE: Official student rosters can be obtained from WebAdvisor and compared with Blackboard. Students who are not listed in Blackboard but listed in WebAdvisor should call the helpdesk at 3791 for assistance.
Wednesday, August 27, 2008
Tip #30: Learning Objects
Tip: You can add Learning Objects to your Blackboard course.
What are Learning Objects?
Learning Objects are tools that can be used in your Blackboard course to facilitate interaction. There are 3 tools that instructors can use in their courses:
1. Blog tool: The blog tool allows users to contribute to and/or comment on course blogs. For additional information on the blog tool, visit our support website.
2. Wiki tool: The wiki tool allows users to collaborate in constructing shared web spaces. For additional information on the wiki tool, visit our support website.
3. Podcast tool: The podcast tool allows instructors to upload podcasts to their Blackboard courses or link to podcasts from other sources. For additional information on the podcast tool, visit our support website.
Activating Learning Objects in your course:
Before you can use the learning objects, you need to first activate them in the course. Navigate to the Control Panel and click Manage Tools. Select Building Block Tool Availability and check the tools you plan to use. Click Submit. Then from the Manage Tools menu select Content Type Availability. Check the tools you plan to use. Click Submit.
Adding Learning Objects to your course:
Learning Objects can be added to your course in the same way that Assignments are added to courses. Navigate to the content area to which you want to add a Learning Object. Click the Edit View link in the top right corner of the page. Click the drop-down box next to the words Select: Learning Unit and select the Learning Object you want to add. Click the Go button. To configure the options for that Learning Object, navigate to the Control Panel and click the appropriate Configure/Manage option for the tool.
Wednesday, August 20, 2008
Tip #29: Beginning of the Semester Tasks
Beginning of semester tasks:
1. Enhance course design and menu options.
2. Combine multiple course sections into one shell (if applicable).
3. Make the course available.
Completing the beginning of semester tasks:
Enhancing the course design and menu options
1) Access your course
2) Click the Control Panel link
3) Click Course Design
In the Course Design area, you can choose a course menu design, manage how the menu is displayed, manage the tool panel, and add/change the course banner.
4) Return to the Control Panel and click Manage Course Menu
5) To re-arrange the order of menu items, click the number next to an item and select a new number order for the item
6) To modify or remove a menu item, click the Modify or Remove button next to an item
7) To add a content area, link to a course tool, a link to a course area, or an external link to the course menu, click the appropriate button at the top of the page
8) Click OK
Combining multiple course sections into one shell (if applicable)
1) Access the course from which you want to move users
2) Click the Control Panel link
3) Under the Course Options category, click Course Copy
4) Click Copy Course Materials into an Existing Course
5) Type or Search for the Destination Course ID (the Destination Course is the course to which to enrollments will be copied)
6) Place a checkmark next to Tasks and next to Enrollments
7) Click Submit; you will receive an email notification when the enrollments copy is complete
Making the course available
1) Access the course you want to make available
2) Click the Control Panel link
3) Under the Course Options category, click Settings
4) Click Course Availability
5) Select Yes
6) Click Submit
Wednesday, August 13, 2008
Tip #28: Discussion Board Changes
In response to faculty and student feedback, some of the features of the discussion boards have changed.
What changes will I see in the Discussion Boards?
You will see improvements to the Discussion Boards. Users will have the option to mark posts as “read” by selecting threads and clicking a Mark as Read button. Users can also see the number of unread posts in a forum and click the number to view those posts.
Users will be able to choose a view setting for their Discussion Board: Tree View or List View. The List View is the view setting currently available in Blackboard. The Tree View is similar to the view setting that was previously available in Blackboard before 2008.
Instructors can enable new discussion forum settings. Instructors can enable tagging, which allows users to tag discussion posts with searchable keywords. Instructors can allow users to subscribe to discussion forums and/or discussion threads. Instructors can also enable replying with a quote, which allows users to embed a quote from the discussion thread to which they are replying.
Friday, August 1, 2008
Tip #27: Creating Assignments
Tip: You can create Assignments to which students will submit their work.
Here’s how to do it:
Navigate to the content area to which you will add your Assignments. For example, if you want to add your assignments to the Assignments content area, click the Assignments link on the course menu.
Click the Edit View button at the top right corner of the page. Click the drop-down menu next to + Select: and select Assignment. Click Go.
Name the assignment, type the points possible for the assignment, and type instructions for students. You can also attach a file for students to download. Select the dates you want to make the Assignment available and click Submit. NOTE: A Gradebook column for the Assignment will automatically be generated.
Assignments versus Digitial Dropbox:
We recommend that instructors use the Assignments feature, rather than the Digital Dropbox, to collect students’ work. Some benefits of using the Assignments feature are:
· The Assignments feature generates a Gradebook item. This means that, when students submit work to an Assignment, a completion indicator (!) is placed in the Gradebook column for that Assignment. Students’ submitted work can be viewed and graded within the Gradebook. Students’ assignments can be downloaded all at once and saved to the instructor’s computer, for grading at a later time (see Tip # 20).
· The Assignments feature is intuitive and easy for students to use. To submit their Assignments, students click the View/Complete Assignment link underneath the Assignment name and description. Students can then attach their files and click Submit to complete their Assignment.
· Instructors can provide feedback with students’ grades using the Comments box or by attaching a file for the students.
Want more information?
Step-by-step tutorials are available at: http://www.twu.edu/blackboard/Bb72Tutorials.asp
Visit our website: http://www.twu.edu/blackboard,
or call: (940) 898-3706
Wednesday, July 23, 2008
Tip #26: Using tables to organize VTBE content
Tip: Use tables in the Visual Text Box Editor (VTBE) to organize your content and images.
Here’s how to do it:
Navigate to a content area in your course (e.g. Course Documents) and click the Edit View link in the upper right-hand corner of the page. Click the + Item button to add a new item. Name the item and then click in the text box below. This is where you will add your table.
On the Visual Text Box Editor (VTBE), click the Create Table button.
Select the number of columns and rows for the table. Click Submit to add the table to the text box.
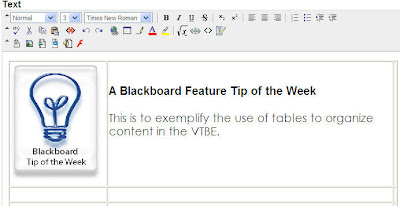
Add text or images to your table. After you have added your content, click the Submit button to save your content. Below is an example of how you might use tables to organize your content:
How to remove the table outlines:
To remove the table outlines, you will need to modify the HTML code for the table. Click the < > button on the VTBE to open the HTML view. You will see the following format code for the table:
Here’s how to do it:
Navigate to a content area in your course (e.g. Course Documents) and click the Edit View link in the upper right-hand corner of the page. Click the + Item button to add a new item. Name the item and then click in the text box below. This is where you will add your table.
On the Visual Text Box Editor (VTBE), click the Create Table button.
Select the number of columns and rows for the table. Click Submit to add the table to the text box.
Add text or images to your table. After you have added your content, click the Submit button to save your content. Below is an example of how you might use tables to organize your content:

How to remove the table outlines:
To remove the table outlines, you will need to modify the HTML code for the table. Click the < > button on the VTBE to open the HTML view. You will see the following format code for the table:
To remove the table outlines, you will need to modify the HTML code for the table. Click the < > button on the VTBE to open the HTML view. You will see the following format code for the table:

In the part of the code that says “border=1”, change the 1 to a 0. Click the < > button again to switch back to your standard view. You will see that the table borders have disappeared. Click Submit to save your changes.
Want more information?
Step-by-step tutorials are available at: http://www.twu.edu/blackboard/Bb72Tutorials.asp
Visit our website: http://www.twu.edu/blackboard,or call: (940) 898-3706
Step-by-step tutorials are available at: http://www.twu.edu/blackboard/Bb72Tutorials.asp
Visit our website: http://www.twu.edu/blackboard,or call: (940) 898-3706
Monday, July 21, 2008
Tip #25: Adding audio, video, or Flash using the VTBE
Tip: You can add audio, video, or Flash to a Blackboard item using the Visual Text Box Editor (VTBE).
Here’s how to do it:
Navigate to a content area in your course (e.g. Course Documents) and click the Edit View link in the upper right-hand corner of the page. Click the + Item button to add a new item. Name the item and then click in the text box below. This is where you will add the audio, video, or Flash.
On the Visual Text Box Editor (VTBE), click the Add button for the component you would like to add (from left to right, those buttons are Add MPEG/AVI content, Add QuickTime content, Add Audio content, and Add Flash content):

Click the Browse button to locate the file on your computer or external drive. Select the file options you would like and click the Submit button. On the preview page, click Submit again to add your content.
Caution regarding adding audio, video, or Flash files:
Be aware of the file size of the audio, video, or Flash file you add to your course. The larger the file size, the more difficulties students will experience in viewing that file and the Blackboard page on which the file is located. We recommend that any file uploaded to Blackboard is no larger than 5 MB.
Be aware of the file size of the audio, video, or Flash file you add to your course. The larger the file size, the more difficulties students will experience in viewing that file and the Blackboard page on which the file is located. We recommend that any file uploaded to Blackboard is no larger than 5 MB.
Want more information?
Step-by-step tutorials are available at:
http://www.twu.edu/blackboard/Bb72Tutorials.aspStep-by-step tutorials are available at:
Visit our website: http://www.twu.edu/blackboard,
or call: (940) 898-3706
Wednesday, July 9, 2008
Tip #24: Adding an image using the VTBE
Tip: Add an image to your course using the Visual Text Box Editor (VTBE).
Here’s how to do it:
Navigate to a content area in your course (e.g. Course Documents) and click the Edit View link in the upper right-hand corner of the page. Click the + Item button to add a new item. Name the item and then click in the text box below. This is where you will add the image.
On the Visual Text Box Editor (VTBE), click the Add Image button.

Click the Browse button to locate the image file on your computer or external drive. Select any image options you would like and click the Submit button. Resize the image by clicking on the image and dragging the corners in or out, depending on whether you want to enlarge or shrink the image.
What to do if you do not see the VTBE:
Check to make sure that your VTBE is enabled. On your Blackboard welcome page (where your courses are listed), click the Personal Information link on the left-hand Tools menu. Click Set Visual Text Box Editor Options and make sure that the VTBE is enabled. Click Submit. You will need to log out and log back in to Blackboard to see your changes.
The VTBE for Safari users does not have the Add Image button. Macintosh users should use the Firefox browser to enable the full version of the VTBE.
Want more information?
Step-by-step tutorials are available at:
http://www.twu.edu/blackboard/Bb72Tutorials.aspStep-by-step tutorials are available at:
Visit our website: http://www.twu.edu/blackboard,
or call: (940) 898-3706
Tuesday, July 8, 2008
Tip #23: Creating an anonymous survey
Tip: You can create an anonymous survey in Blackboard.
Here’s how to do it:
Navigate to the Control Panel of your course and click Survey Manager. Click the + Add Survey button. Type a name for the survey and type any description or instructions you want to provide. Click Submit.
Add questions to the survey by clicking the drop-down menu next to the words Add Calculated Formula. Select the type of question you would like to add and click the Go button. For open-ended questions, select the Short Answer or Essay question types. Continue adding questions until you have completed your survey.
To launch the survey in your course, navigate to the course area to which you would like to add the survey. Click the Edit View link at the upper right corner of the page. Click the drop-down menu next to the words + Select: Learning Unit and select the Survey option. Click the Go button. Select the survey you created and click Submit. To change the survey availability and settings, click the Modify the Survey options link on the following page.
Survey anonymity in Blackboard:
Surveys in Blackboard are anonymous, so you will not be able to discern individuals’ survey answers. To view the full survey results, navigate to your course Gradebook. Locate the survey Gradebook item and click name of the survey. Click the Download Results link and select your download options. NOTE: Microsoft Excel will open a .csv file or a tab-delimited file.
Want more information?
Step-by-step tutorials are available at: http://www.twu.edu/blackboard/Bb72Tutorials.asp
Visit our website: http://www.twu.edu/blackboard,
or call: (940) 898-3706
Thursday, June 26, 2008
Tip #22: Adding a course tool link
Tip: You can add a course tool link to a content area in your course.
Here’s how to do it:
Enter your course and click the course menu link for the content area to which you would like to add a tool. For example, if you want to add a tool link to your Course Documents content area, click on Course Documents.
Click the Edit View link on the top right corner of the page. Click the drop-down menu next to the Select icon and select the Tool option. Click Go.

Select the tool link you want to add and click the Next button.
Using tool links:
Consider adding tools to content areas to facilitate students’ navigation of the course. For example, if the students’ first task in the course is to create a Blackboard homepage, consider adding a homepage tool link to your First Tasks, Syllabus, or Assignments content area.
Want more information?
Step-by-step tutorials are available at:
http://www.twu.edu/blackboard/Bb72Tutorials.asp
Visit our website: http://www.twu.edu/blackboard,
or call: (940) 898-3706
Tuesday, June 24, 2008
Tip #21: Adding a glossary
Tip: You can add a glossary to your Blackboard course.
Here’s how to do it:
Navigate to your course Control Panel and click Glossary Manager. Click the +Add Term button to add a new term and its definition. Click Submit to save the term and definition. Follow the same steps to add more terms to the glossary.
You can create your glossary in Excel or in Notepad and upload it into your Blackboard shell. Click the Upload Glossary button and Browse for the glossary file you created. Click Submit to upload the glossary.
Creating a glossary in Excel or Notepad:
Create your glossary in Excel by creating a column for the terms and a column for the definitions. Save the Excel glossary as a tab-delimited file or .csv file.
To create your glossary in Notepad, type the term and definition in quotation marks and separate the term and definition with a comma: “term”,“definition” (do not type any spaces between the characters). Save the Notepad file as a .txt file or .csv file.

Want more information?
Step-by-step tutorials are available at: http://www.twu.edu/blackboard/Bb72Tutorials.asp
Visit our website: http://www.twu.edu/blackboard,
or call: (940) 898-3706
Thursday, June 12, 2008
Tip #20: Downloading students' Assignments all at once
Tip: Download students’ Assignments to your computer all at once through the Gradebook.
Here’s how to do it:
The Blackboard Assignments feature gives instructors several options for viewing students’ work. Create an Assignment to which students can submit their work. When you are ready to download students’ work, navigate to your course Gradebook.
Click the name of the Assignment in the Gradebook and click Item Download. To download all the students’ Assignments, click the Select All link at the top of the page and click Submit. The students’ assignments will be packaged as a .zip file that can be downloaded to your computer. Right-click the link provided, select “Save Target As…” and save the file to your computer.
Errors when downloading students’ assignment files:
Some instructors may receive an error when attempting to download students’ Assignments all at once. To reduce the incidence of this error, recommend to students that they follow Blackboard-appropriate naming conventions (see Tip # 19). If you still encounter the problem, download the students’ Assignments individually.
Want more information?
Step-by-step tutorials are available at: http://www.twu.edu/blackboard/Bb72Tutorials.asp
Visit our website: http://www.twu.edu/blackboard,
or call: (940) 898-3706
Friday, June 6, 2008
Tip #19: Naming files for Blackboard
Tip: Reduce the number of error messages you and students receive when opening files by appropriately naming files uploaded to Blackboard.
Here’s how to do it:
There are several file name characters that may lead to error messages when instructors or students upload or download files. To reduce the occurrence of those errors, follow these naming conventions:
• Use only letters, numbers, underscores, and hyphens in file names
• Use hyphens or underscores in place of spaces in file names
• Do not use periods in a file name, except before the file extension (e.g. “Name_test1.doc”)
• Do not use spaces, commas, pound signs (#), question marks, equal signs, ampersands (&), asterisks (*), or any other special characters in file names
• Keep file names under 60 characters in length
You may recommend to students that they follow these same naming conventions. This is helpful when you are downloading multiple students’ files all at once (e.g. downloading students’ completed assignments)
Uploading multiple files into Blackboard:
When you upload multiple files into Blackboard, they are automatically organized numerically then alphabetically by the name of the file. If you want a specific order in which your files will appear, name the files accordingly. For example, you may name a file 1_Hill_article and another file 2_McCubbins_article so that they appear in numerical order.
Want more information?
Step-by-step tutorials are available at: http://www.twu.edu/blackboard/Bb72Tutorials.asp
Visit our website: http://www.twu.edu/blackboard,
or call: (940) 898-3706
Thursday, May 22, 2008
Tip #18: Downloading/uploading your Gradebook
Tip: You can download your Gradebook into Microsoft Excel and upload your Gradebook into Blackboard from Excel.
Here’s how to do it:
To download your Blackboard Gradebook to Excel, navigate to your course Gradebook. Click the Download Grades button. Select the Tab filter type and click Submit. Right-click the Download button and select Save Target As…
Name the file and select the location on your computer to which you want to save the file. Click the Save button. Locate the file you saved, double-click the file, and it will open in Microsoft Excel.
NOTE: We recommend that instructors periodically download their Gradebooks to an external drive for record-keeping purposes.
Upload your Gradebook from Excel into Blackboard:
Navigate to your Gradebook and click the Upload Grades button. Click the Browse button to locate the Excel file on your computer hard drive. Click Submit. Select the Excel column you want to import. Select the column to which you will import the Excel information or select the option to create a new Gradebook column. NOTE: You can import only one column at a time. Click Submit.
On the next page, select which students’ grades you want to upload or click the Select All button to upload all students’ grades. Click Submit.
Want more information?
Step-by-step tutorials are available at: http://www.twu.edu/blackboard/Bb72Tutorials.asp
Visit our website: http://www.twu.edu/blackboard,
or call: (940) 898-3706
Tip #17: Beginning of semester checklist
Tip: Beginning of semester tasks
Beginning of semester tasks:
1. Enhance course design and menu options.
2. Combine multiple course sections into one shell (if applicable).
3. Make the course available.
Completing the beginning of semester tasks:
Enhancing the course design and menu options
1) Access your course
2) Click the Control Panel link
3) Click Course Design
In the Course Design area, you can choose a course menu design, manage how the menu is displayed, manage the tool panel, and add/change the course banner.
4) Return to the Control Panel and click Manage Course Menu
5) To re-arrange the order of menu items, click the number next to an item and select a new number order for the item
6) To modify or remove a menu item, click the Modify or Remove button next to an item
7) To add a content area, link to a course tool, a link to a course area, or an external link to the course menu, click the appropriate button at the top of the page
8) Click OK
Combining multiple course sections into one shell (if applicable)
1) Access the course from which you want to move users
2) Click the Control Panel link
3) Under the Course Options category, click Course Copy
4) Click Copy Course Materials into an Existing Course
5) Type or Search for the Destination Course ID (the Destination Course is the course to which to enrollments will be copied)
6) Place a checkmark next to Tasks and next to Enrollments
7) Click Submit; you will receive an email notification when the enrollments copy is complete
Making the course available
1) Access the course you want to make available
2) Click the Control Panel link
3) Under the Course Options category, click Settings
4) Click Course Availability
5) Select Yes
6) Click Submit
Want more information?
Step-by-step tutorials are available at: http://www.twu.edu/blackboard/Bb72Tutorials.asp
Visit our website: http://www.twu.edu/blackboard,
or call: (940) 898-3706
Thursday, May 1, 2008
Tip #16: End of Semester Checklist
Tip: End of Semester Checklist
End-of-semester checklist:
1. Export the final course gradebook.
2. Archive your Blackboard course.
3. Make the course unavailable.
Completing the end-of-semester tasks:
Exporting the Blackboard Gradebook
1) Access the course that contains the Gradebook you want to export
2) Click the Control Panel link
3) Click Gradebook
4) Click the Download Grades button
5) Select Comma or Tab as the Delimiter Type (both file types can be opened in MS Excel)
6) Click the Submit button and then click the Download button
7) Save the file to your Desktop (or anywhere on your computer that is appropriate)
8) Click OK
Archiving a Blackboard Course
1) Access the course you want to archive
2) Click the Control Panel link
3) Under the Course Options category, click Archive Course
4) Click the Archive button
5) Click Submit
6) After you receive the archive completion email, navigate to the Archive Course page again. Right-click the zipped course file and click Save Target As… to save the file to your computer
7) Click OK
Making a Course Unavailable
1) Access the course you want to make unavailable
2) Click the Control Panel link
3) Under the Course Options category, click Settings
4) Click Course Availability
5) Select No
6) Click Submit
Want more information?
Step-by-step tutorials are available at: http://www.twu.edu/blackboard/Bb72Tutorials.asp
Visit our website: http://www.twu.edu/blackboard,
or call: (940) 898-3706
Tip #15: Filtering and sorting the Gradebook
Tip: You can sort and filter items in your Gradebook.
Here’s how to do it:
Navigate to your course Gradebook. You can sort Gradebook items by Position, Category, Date Added, Date, Points Possible, Title, and Weight. Select your sort criteria and click the Go button. Sorting is useful to locate specific columns in the Gradebook and to minimize scrolling to find these columns.
Filtering your Gradebook allows you to view only the items you specify. You can filter your Gradebook by Category or by users’ last names.
Filtering Items by Category:
Categories are created automatically for all Gradebook items. To manually categorize items or change categories in the Gradebook, click the Manage Items button and click the Modify button next to an item for which you would like to change the category. Select a category from the drop-down list and click Submit.
After categorizing the Gradebook items, select the category by which you would like to filter the items and click the Go button. To view all Gradebook items again, select All as the filter category and click the Go button.
Want more information?
Step-by-step tutorials are available at: http://www.twu.edu/blackboard/Bb72Tutorials.asp
Visit our website: http://www.twu.edu/blackboard,
or call: (940) 898-3706
Thursday, April 17, 2008
Tip #14: Locking Discussion Board threads
Tip: You can lock Discussion Board threads so that students cannot edit their posts or add to the thread.
Here’s how to do it:
Navigate to the Discussion Board area in your course. Click on the discussion forum in which you would like to lock threads. Place a checkmark in the boxes to the left of the threads you would like to lock. If you want to lock all threads, click the Go button next to the Select All drop-down menu at the bottom of the page.
After selecting the threads, click the Lock button at the top of the page. Notice that the status of the locked threads will change from Published to Locked. A locked thread is still readable by users but can no longer be added to or modified.
Unlocking Discussion Board threads:
To unlock a Discussion Board thread, place a checkmark in the box next to the thread and click the Unlock button.
Want more information?
Step-by-step tutorials are available at: http://www.twu.edu/blackboard/Bb72Tutorials.asp
Visit our website: http://www.twu.edu/blackboard,
or call: (940) 898-3706
Thursday, April 10, 2008
Tip #13: Early Warning System Rules
Tip: You can assess students’ progress in your course by creating Early Warning System rules.
Here’s how to do it:
Navigate to your course Control Panel and click the Early Warning System. You can add a Grade Rule, a Due Date Rule, or a Last Access Rule.
Here’s how to do it:
Navigate to your course Control Panel and click the Early Warning System. You can add a Grade Rule, a Due Date Rule, or a Last Access Rule.
- A Grade rule identifies when student performance is equal to, below, or above a defined level.
- A Due Date rule identifies students who do not complete work by the due date.
- A Last Access rule identifies the last time a student accessed the course.
Example: Adding a Grade rule
In this example, an instructor chooses to receive Early Warning System notification for every student who scores lower than a 70 on the Midterm exam. Click the + Grade Rule button and type a name for the rule. Select a Gradebook item for which you would like to be notified; in this example the instructor selects the Midterm exam. Define the criteria (e.g., less than or equal to) and the score (e.g. 70). Click Submit to save the rule.
Place a checkmark next to the new rule and click the Refresh button. Exit the Early Warning System and return to that area to view the updated page. To view a list of the students who meet the criteria, click the name of the rule. NOTE: The rules do not automatically update; you must Refresh the rules to see if any new students meet the criteria.
Want more information?
Step-by-step tutorials are available at: http://www.twu.edu/blackboard/Bb72Tutorials.asp
Visit our website: http://www.twu.edu/blackboard,
or call: (940) 898-3706
Thursday, April 3, 2008
Tip #12: Adding Gradebook comments
Tip: You can add comments to any Gradebook item.
Here’s how to do it:
Navigate to your course Gradebook and click the name of Gradebook item. Click Item Grade List and enter students’ scores (if scores have not already been submitted for the item). Click Submit to save the scores. NOTE: A grade must be submitted for a Gradebook item before you can add comments to the item.
Click the name of the Gradebook item again and click Item Grade List. Click the Modify Comments button next to a student’s grade. Type or paste in your comment in the Comment box. If you want the student to be able to see the comment, make sure the Is Public box is checked. Unchecking the Is Public box will hide the comment from the student. Click Submit to save the comment. Click Submit on the Item Grade List page to save your changes.
Want more information?
Step-by-step tutorials are available at: http://www.twu.edu/blackboard/Bb72Tutorials.asp
Visit our website: http://www.twu.edu/blackboard,
or call: (940) 898-3706
Wednesday, April 2, 2008
Tip #11: Turning on/off course tools
Tip: You can turn on or turn off course tools in your Blackboard shell.
Here’s how to do it:
Navigate to the Control Panel of your course. Click Manage Tools. Click Tool Availability to choose the availability of course tools such as Email, Groups, Messages, and Roster. Click Building Block Tool Availability to choose the availability of Advanced Group Management and Add Users by Role tools. Click Content Type Availability to choose the availability of content types that can be added to content areas.
Communication tools:
You can make communication tools available or unavailable by navigating to the Control Panel and clicking Manage Course Menu. Click the Modify button next to the Communication menu item. Select the availability of the listed tools and click Submit.
Turning off tools:
You may want to turn off some of the tools that you will not be using so that students do not use those tools. For example, if you are using Email instead of Messaging, you may consider turning off Messaging so that students do not try to use that tool to communicate with you.
Want more information?
A step-by-step tutorial is available at: http://www.twu.edu/blackboard/Bb72Tutorials.asp
Visit our website: http://www.twu.edu/blackboard,
or call: (940) 898-3706
Wednesday, March 26, 2008
Tip #10: Enabling Review Status
Tip: You can enable Review Status for course items.
Here’s how to do it:
Enter your course and navigate to the item to which you want to add Review Status. Click the Edit View link on the top right corner of the page to bring up options for that item. Click the Manage button for that item.
Click Review Status and select the Enable option. Click Submit. Click OK to return to the main content area page. Click the Display View link on the top right corner of the page to view what the students will see.
Using Review Status:
Review Status may be helpful if you have a document or course item that you want to verify whether or not students have viewed it. For example, you might add Review Status to a document containing course policies so that students can acknowledge that they read the document.
Review Status tracking is available through the Performance Dashboard. Navigate to the Control Panel and then click Performance Dashboard. In the Review Status column, you will see the number of course items each student has marked as review. Click on a number in that column to view specific information about what a student has and has not marked as reviewed.
Want more information?
Step-by-step tutorials are available at: http://www.twu.edu/blackboard/Bb72Tutorials.asp
Visit our website: http://www.twu.edu/blackboard,
or call: (940) 898-3706
Tuesday, March 18, 2008
Tip #9: Copying Discussion Board forums
Tip: You can copy a Discussion Board forum within a course or to a group in a course.
Here’s how to do it:
Enter the course in which you would like to copy a forum. Click the Discussion Board course menu link. Click the Copy button next to the forum that you would like to copy.
On the next screen, type a Name for the copied Discussion Board forum. Select whether you would like to copy the Entire forum or just the Forum Settings. NOTE: If you copy the Entire forum, all posts will be copied with the forum. If you copy only the Forum settings, no posts will be copied.
Select the location to which you would like to copy the Discussion Board forum. You can select to copy the forum into the course Discussion Board area* or to one of the course groups, if you enabled groups in your course. Click Submit to submit your copy request. You will receive confirmation via email that the forum copy was successfully completed.
*NOTE: The course Discussion Board area is designated by your course ID. If you do not have any groups in your course, only the Discussion Board area will be listed in your Location box.
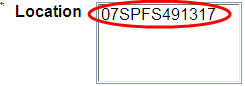
Want more information?
Step-by-step tutorials are available at: http://www.twu.edu/blackboard/Bb72Tutorials.asp
Visit our website: http://www.twu.edu/blackboard,
or call: (940) 898-3706
Monday, March 10, 2008
Tip #8: Create and manage groups with Advanced Group Management
Tip: Create and manage groups using the Advanced Group Management tool.
Here’s how to do it:
Navigate to the Control Panel of your course and click Advanced Group Management. Click Add Group to add a new group. Name the group and select the communication tools for that group. Click Submit.
Add users to your group by placing a checkmark next to the group name and clicking View/Assign Users. Click Modify and place a checkmark next to the users you want to add to the group. Click Submit.
Discussion Forums in groups: When you enable the discussion board tool in a group, a forum for that group is automatically created. You can create additional forums in a group and copy those forums to other groups using the Copy button for each forum. NOTE: Every graded discussion forum in a group will automatically generate a Gradebook item.
Want more information?
Step-by-step tutorials are available at: http://www.twu.edu/blackboard/Bb72Tutorials.asp
Visit our website: http://www.twu.edu/blackboard,
or call: (940) 898-3706
Monday, March 3, 2008
Tip #7: Multiple attempts on tests
Tip: When allowing multiple attempts on a test, you can choose which of the students’ attempts will be counted as the final score for that test.
Here’s how to do it:
Add the test to a content area and click the Modify button and then click Modify Test Options. Click Allow Multiple Attempts and select whether you will allow unlimited attempts or a specific number of tests. Make the test available and select dates for availability. Click Submit.
Click Control Panel and click Gradebook. Click the name of the Gradebook item for the test you added. Click Modify Gradebook Item.
Click the drop-down menu next to the words “Score Attempts Using” and select one of the following options:
(1) Grade of last attempt
(2) Grade of first attempt
(3) Highest grade
(4) Lowest grade
(5) Average of grades
Click Submit to save your changes.
If you do not select one of the options above, the Gradebook will default to Grade of Last Attempt. This means that, when students take a test multiple times, the Gradebook will record their last attempts as the final scores for that item.
Want more information?
Step-by-step tutorials are available at: http://www.twu.edu/blackboard/Bb72Tutorials.asp
Visit our website: http://www.twu.edu/blackboard,
or call: (940) 898-3706
Monday, February 25, 2008
Tip #6: Broadcasting announcements
Tip: You can broadcast course announcements via email to your students.
Here’s how to do it:
Navigate to the Control Panel of the course in which you want to make an announcement. Click Announcements and click the Add Announcement button. Type your announcement subject and message. Select the display dates for the announcement, if any, and select whether or not the announcement will be permanent. NOTE: Non-permanent announcements disappear from the main announcements page after 7 days and they are listed after permanent announcements in the course view.
Check the box next to Email this announcement to all course users. Click Submit. A copy of the announcement will be sent to the email addresses listed by users in Blackboard. By default, the email addresses for Blackboard users are their Portal email accounts. However, if a user chooses to change his or her listed email address in Blackboard to an alternate account (e.g. yahoo, hotmail, gmail), the announcement email will be sent to the user’s alternate account.
NOTE: Some email accounts may categorize Blackboard emails as SPAM. We recommend that you confirm with students that they are receiving your emails that are sent through Blackboard.
Want more information?
Step-by-step tutorials are available at: http://www.twu.edu/blackboard/Bb72Tutorials.asp
Visit our website: http://www.twu.edu/blackboard,
or call: (940) 898-3706
Tip #5: Copying an item from one course to another
Tip: You can copy an item from one course to another without having to use the Course Copy function on the Control Panel.
Here’s how to do it:
Enter the course from which you want to copy an item. Click on the content area where the item is located. For example, if you want to copy a folder that is located in Course Documents, click on the Course Documents course menu link. Click the Edit View link on the top right corner of the page.
Click the Copy button next to the item you want to copy. On the next screen, select the destination course from the drop-down list of courses. NOTE: Only courses for which you are an instructor are listed in this drop-down list. Click Browse to find a destination folder within the destination course. Also select whether you would like the item to be removed from the current course after it is copied to the destination course.
Click Submit to submit your copy request. You will receive confirmation via email that the item copy was successfully completed. Navigate to the destination course to confirm that the item was successfully copied.
Want more information?
Step-by-step tutorials are available at: http://www.twu.edu/blackboard/Bb72Tutorials.asp
Visit our website: http://www.twu.edu/blackboard,
or call: (940) 898-3706
Tuesday, February 12, 2008
Tip #4: Arranging the course menu
Tip: You can arrange the course menu to help students to navigate your course easily.
Here’s how to do it:
Log into Blackboard and enter your course. Click Control Panel and click Manage Course Menu. Change the order of items on the course menu by clicking the number next to a course menu item and selecting a new rank number for the item. Change the name of a course menu item by clicking the Modify button next to the item. You may also change the item’s availability by clicking the Modify button.
To add a course menu item, use one of the + buttons at the top of the page:

Examples of course menu items:
+Content Area: adds an empty course area to which you can add content. Example: Use this feature to add a Syllabus content area or a Readings content area.
+Tool Link: adds a link to a course tool from the course menu. Example: Use this feature to add a link to email from the course menu.
+Course Link: adds a link to a course item from the course menu. Example: Use this feature to link to a document in the course.
+External Link: adds a link to an external website from the course menu. Example: Use this feature to add a link to a supplemental external website, such as a professional organization website or a wiki.
Want more information?
Step-by-step tutorials are available at: http://www.twu.edu/blackboard/Bb72Tutorials.asp
Visit our website: http://www.twu.edu/blackboard,
or call: (940) 898-3706
Friday, February 1, 2008
Tip #3: Combining multiple sections into one Bb shell
Tip: You can combine your students from multiple sections into one Blackboard course shell. This allows you to run a course in one Blackboard shell rather than in multiple Blackboard shells.
Here’s how to do it:
Log into Blackboard and enter the course from which you would like to copy students. For example, if you are combining Section 21 into Section 20, enter the shell for Section 21. Click Control Panel. Click Course Copy.
Type in or browse for the Destination Course ID. The Destination Course is the course into which students will be copied.* Place a checkmark next to Tasks and Enrollments. Click Submit. You will receive an email notifying you that the course copy is complete.
To confirm that the students were copied, enter the shell to which students were copied, click Control Panel, and click List/Modify Users. Click the Search button to view all enrolled students. After you have confirmed that your students were copied to the correct shell, make the other section(s) unavailable so that students will go only to the combined section.
*Need help finding the course ID?
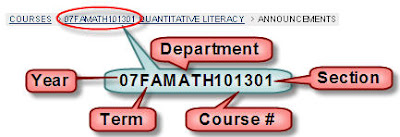
Want more information?
A step-by-step tutorial is available at: http://www.twu.edu/blackboard/Bb72Tutorials.asp
Visit our website: http://www.twu.edu/blackboard,
or call: (940) 898-3706
Friday, January 25, 2008
Tip #2: Making courses available/unavailable
Tip: Make your course available to students at the beginning of the semester.
Here’s how to do it:
Log into Blackboard 7.2 and navigate to the Control Panel area of your course. Click Settings and then click Course Availability. Click Yes next to “Make Course Available”. Click Submit to save your settings. Remember that students will not be able to see their course until you make it available.
You can also make a course unavailable to just one user. Use this feature if a student in your course drops the class; you can make the course unavailable to the student while keeping his/her gradebook records intact. To make a course unavailable to one user, navigate to the Control Panel area of your course and click List/Modify Users. Click the Search button to display all users in the course. Click the Properties button next to the student’s name. Scroll to the bottom of the page, under “Available (this course only)”, and select No. Click Submit to save your changes.
How to know if your course is available or unavailable:
On your Blackboard welcome page, there is a list of all of the courses you are teaching. If the word “unavailable” is in parentheses next to the course name, that course is unavailable.
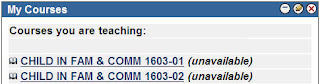
Want more information?
A step-by-step tutorial is available at:
http://www.twu.edu/blackboard/Bb72Tutorials.asp
Visit our website: http://www.twu.edu/blackboard,
or call: (940) 898-3706
Thursday, January 24, 2008
Tip #1: Archiving and Importing Courses
Tip: You can move your content from Blackboard 6.3 to Blackboard 7.2 using the Archive Course and Import options in Blackboard.
Here’s how to do it:
Log into Blackboard 6.3 and enter the Control Panel area of your course. Click Archive Course. Click Submit. The page will refresh and a file name will appear. Right-click the file name and choose the Save File As… option. Save the file to your computer, preferably in an easy-to-locate place.
Log into Blackboard 7.2 and enter the course to which you would like to add the archived course material. Click Control Panel. Click Import Package. Click Browse to find the .zip file that you saved to your computer in the previous step. Select the components of the archived course that you would like to import. Click Submit.
Remember that you will have access to the Blackboard 6.3 server for one year, so you will have ample time to move over any content you need. Your Spring, Summer, and Fall 2007 courses were moved from Blackboard 6.3 to Blackboard 7.2 for you. Note, however, that your Fall 2007 courses were moved to the Blackboard 7.2 server in October, so any content that you added to those courses after mid-October will need to be moved over manually.
Troubleshooting:
If you have trouble with your browser timing out while archiving a course, try a different browser (e.g. Firefox) or try moving the content you need to a blank shell and archiving the blank course. Use the course copy feature to move the content you need to a blank shell (Dissertation shell, Independent Study shell, Practicum shell) and then archive the blank shell. This will reduce the file size that you are archiving and help to prevent browser time-outs.
Want more information?
A step-by-step tutorial is available at: http://www.twu.edu/blackboard/Bb72Tutorials.asp
Visit our website: http://www.twu.edu/blackboard,
or call the Blackboard Faculty Support line: (940) 898-3706
Subscribe to:
Comments (Atom)
